Install .NET Framework 4.7.2 on Azure Service Fabric nodes
It might be a bit surprising, but if you play with Azure Service Fabric - create a new cluster on Azure and a bare-bones application in Visual Studio - you might end up with errors in Cluster Explorer because the service fails to run on the nodes. I’d expect the out of the box experience to be much better, but that’s what it is right now. And the reason is you’re probably running Visual Studio version which defaults to .NET Framework 4.7.1 or even 4.7.2 and by default these are not installed on VMs underlying an Azure Service Fabric cluster! In this post I’ll show you how to fix it using Custom Script VM Extension.
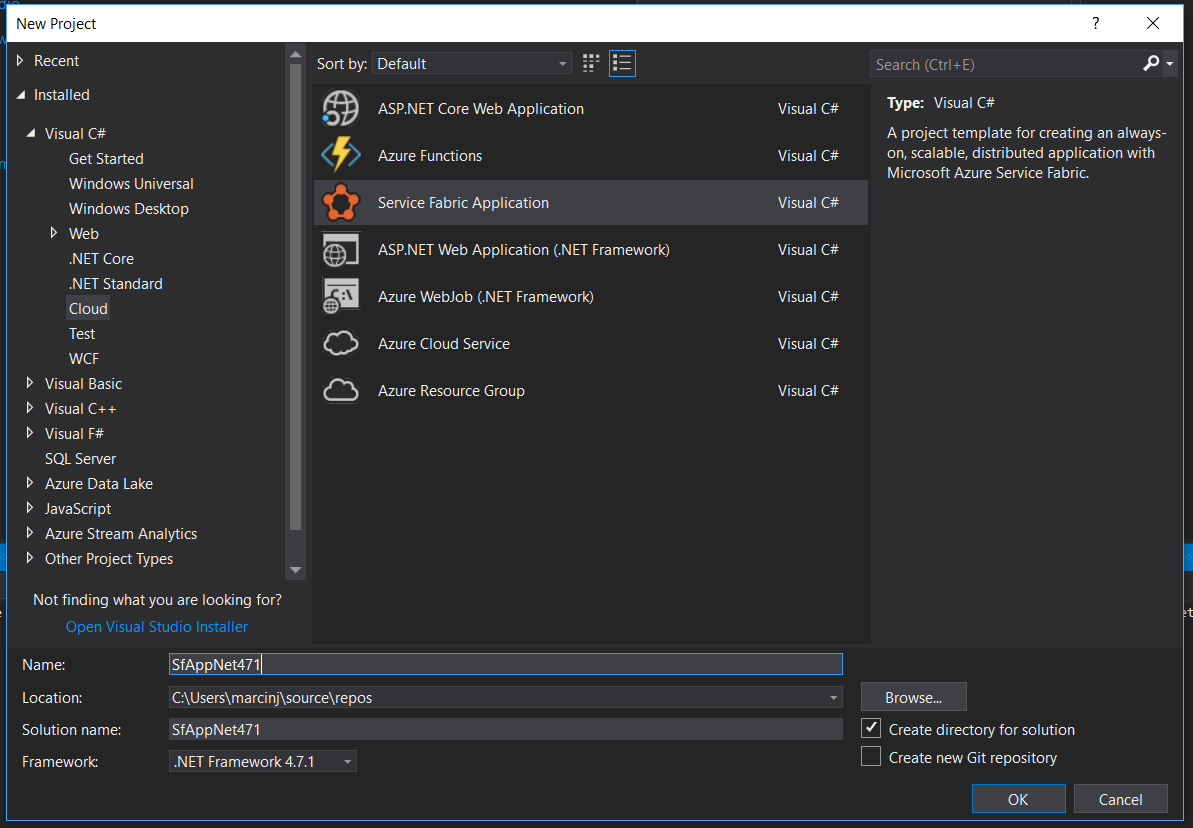
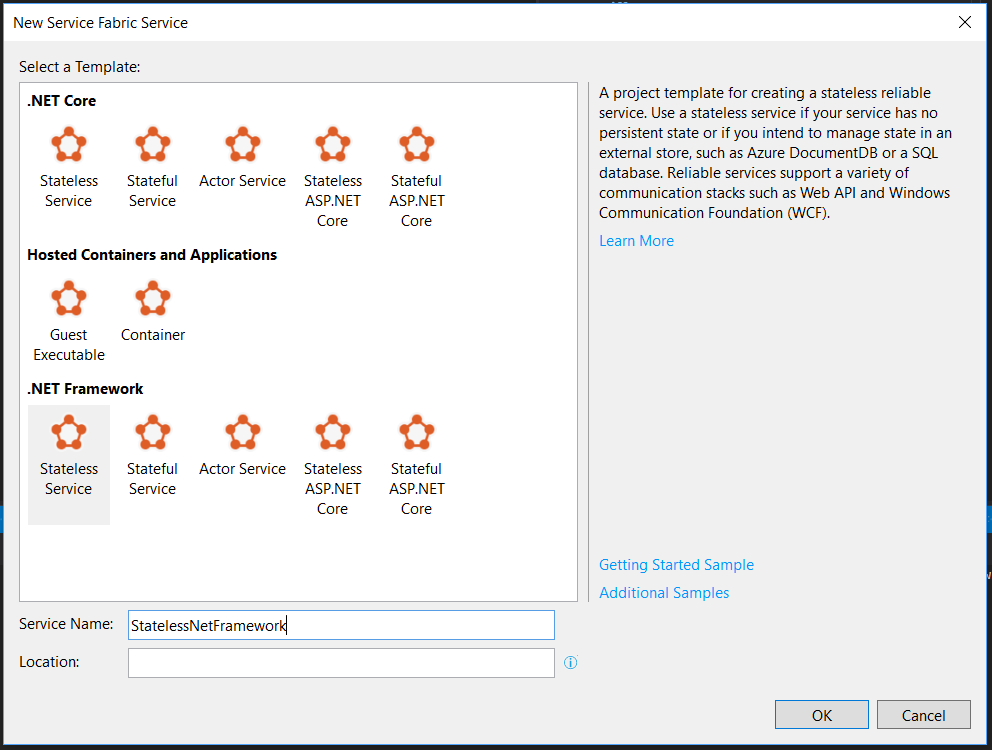
To show what I mean I created a new Service Fabric cluster on Azure and created a new, blank Azure Service Fabric Application in Visual Studio with a single Stateless Service targeting .NET Framework 4.7.1:
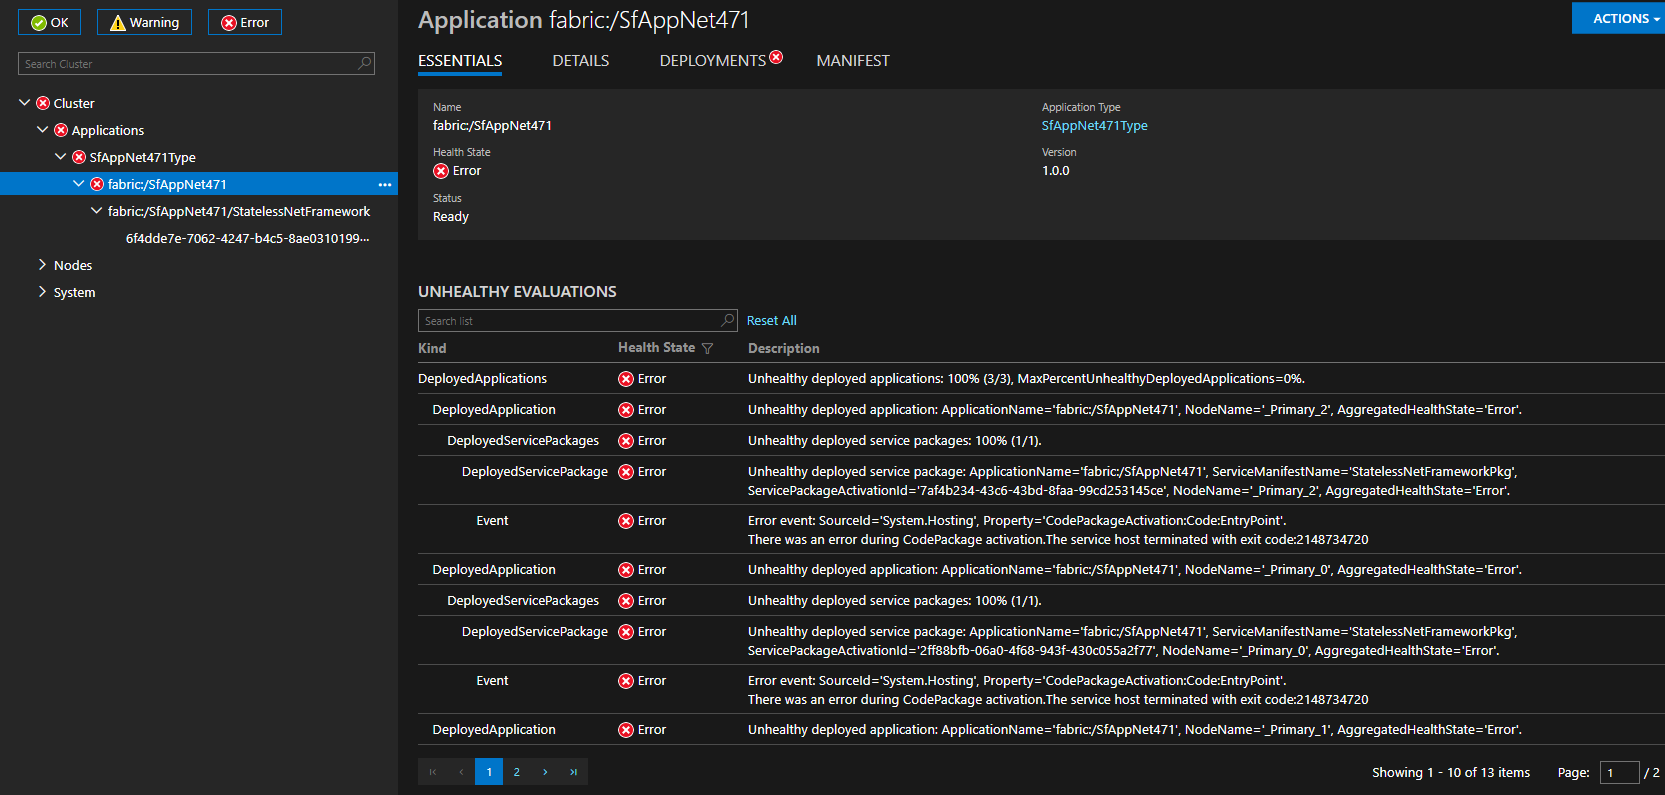
After deploying it to Azure you’ll see a following error in Cluster Explorer:
They are not very descriptive. You could try researching the 2148734720 exit code but the results are not that useful. Things get much clearer when you log into one of the nodes and check Event Viewer:
As you probably remember, .NET Framework 4.7.1 is exactly the version we targeted when creating our service!
A similar issue existed couple years ago when .NET Framework 4.6 shipped but it wasn’t installed by default on Service Fabric clusters in Azure. There are couple great posts on how to deal with this error, e.g. Deploy a Service Fabric Cluster to Azure with .NET Framework 4.6 and Using .NET 4.6 on Azure Service Fabric. They both use a custom PowerShell script run as VM Extension to install the newer .NET Framework version as part of ARM deployment.
I updated the PowerShell script from these posts and uploaded it here: InstallNetFramework472.ps1. You might want to download it and upload to a location you control, in case you don’t trust me.
With the updated script you can update your ARM template and redeploy the cluster. Here’s the extension snippet:
{
   "name":"CustomScriptExtensionInstallNet472",
   "properties":{
      "publisher":"Microsoft.Compute",
      "type":"CustomScriptExtension",
      "typeHandlerVersion":"1.7",
      "autoUpgradeMinorVersion":false,
      "settings":{
         "fileUris":[
            "https://gist.githubusercontent.com/MarcinJuraszek/2393d1de55eb00c637a50d06f58e9017/raw/d878e207f85b25d24bc6cb34c277e058c3239ab3/InstallNetFramework472.ps1
"
         ],
         "commandToExecute":"powershell.exe -ExecutionPolicy Unrestricted -File InstallNetFramework472.ps1"
      },
      "forceUpdateTag":"RerunExtension"
   }
}
You can also do it from the Azure Portal, even after you’ve already created the cluster:
- Go to your VM Scale Set resource in.
- Select Extensions from the list of options.
- Click Add, select Custom Script Extension from the list and click Create.
- Download the script to your machine and upload it in Script file box.
- Click OK to add the extension and get it deployed to all the nodes in the cluster.
WARNING The extension will get deployed on all the nodes at once, and all of them will be restarted, which means the cluster will become unavailable for several minutes. At least that’s what happened to me when I tries that with a 3 node, Bronze-level cluster. It might be different for Silver/Gold clusters.
Once it’s done you’ll see a notification of completion:
After the extension installation is completed the VMs will be restarted and it’ll take few minutes for the cluster to be accessible again. Once the nodes are again joined into the cluster you should see the application working just fine!


